Using CLI tools to manage audio, video, images and PDF files
a collection of useful commands using FFmpeg, Gifsicle, GhostScript, mozjpeg, pngquant, Imagemagick, PDFtk, OCRmyPDF and svgo for the win!
Building, breaking and fixing things. Learning something new everyday.
I'm going to cut straight to the chase here, as the main reason for this post isn't to compare and contrast available tools and so on, but rather to highlight a few useful commands that often come in handy for various situations. This is more like a quick reference for some specific tasks. The focus here is on the following popular tools, which I use quite often:
FFmpeg: A complete, cross-platform solution to record, convert and stream audio and video
Gifsicle: for creating, editing, and getting information about GIF images and animations
ImageMagick: create, edit, compose, or convert digital images
PDFtk: for doing everyday things with PDF documents.
OCRmyPDF: adds an OCR text layer to scanned PDF files, allowing them to be searched
ghostscript: an interpreter for PostScript® and Portable Document Format (PDF) files.
mozjpeg: improves JPEG compression efficiency achieving higher visual quality and smaller file sizes at the same time
pngquant: a utility and library for lossy compression of PNG images. The conversion reduces file sizes significantly (often as much as 70%) and preserves full alpha transparency.
svgo: a Node.js-based tool for optimizing SVG vector graphics files.
This is a work in progress. I'll be updating the commands from time to time, as I encounter them.
FFmpeg
convert video from x to y
Generally speaking, you should be able to convert a video from one format to another by using the following convention:
# x and y here are the file extensions, for instance; mp4, mkv, ogv
ffmpeg -i input.x -c copy output.y
If you encounter any issues, a quick Google search for How to convert x to y using FFmpeg will give you the solution.
Reference(s)
compress video (reduce video size, without a noticeable reduction in quality)
Here, I'm using mp4 videos. If you have other video types (mkv, ogv, webm, etc. then you might need to convert those to mp4 first
# using the libx265 codec
ffmpeg -i input.mp4 -vcodec libx265 -crf 28 output.mp4

# if you don't have libx265, you can use the libx264 codec
ffmpeg -i input.mp4 -vcodec libx264 -crf 28 output.mp4
For more info & technical details, see this Unix & Linux Stack Exchange post: How can I reduce a video's size with ffmpeg?
speed up a video
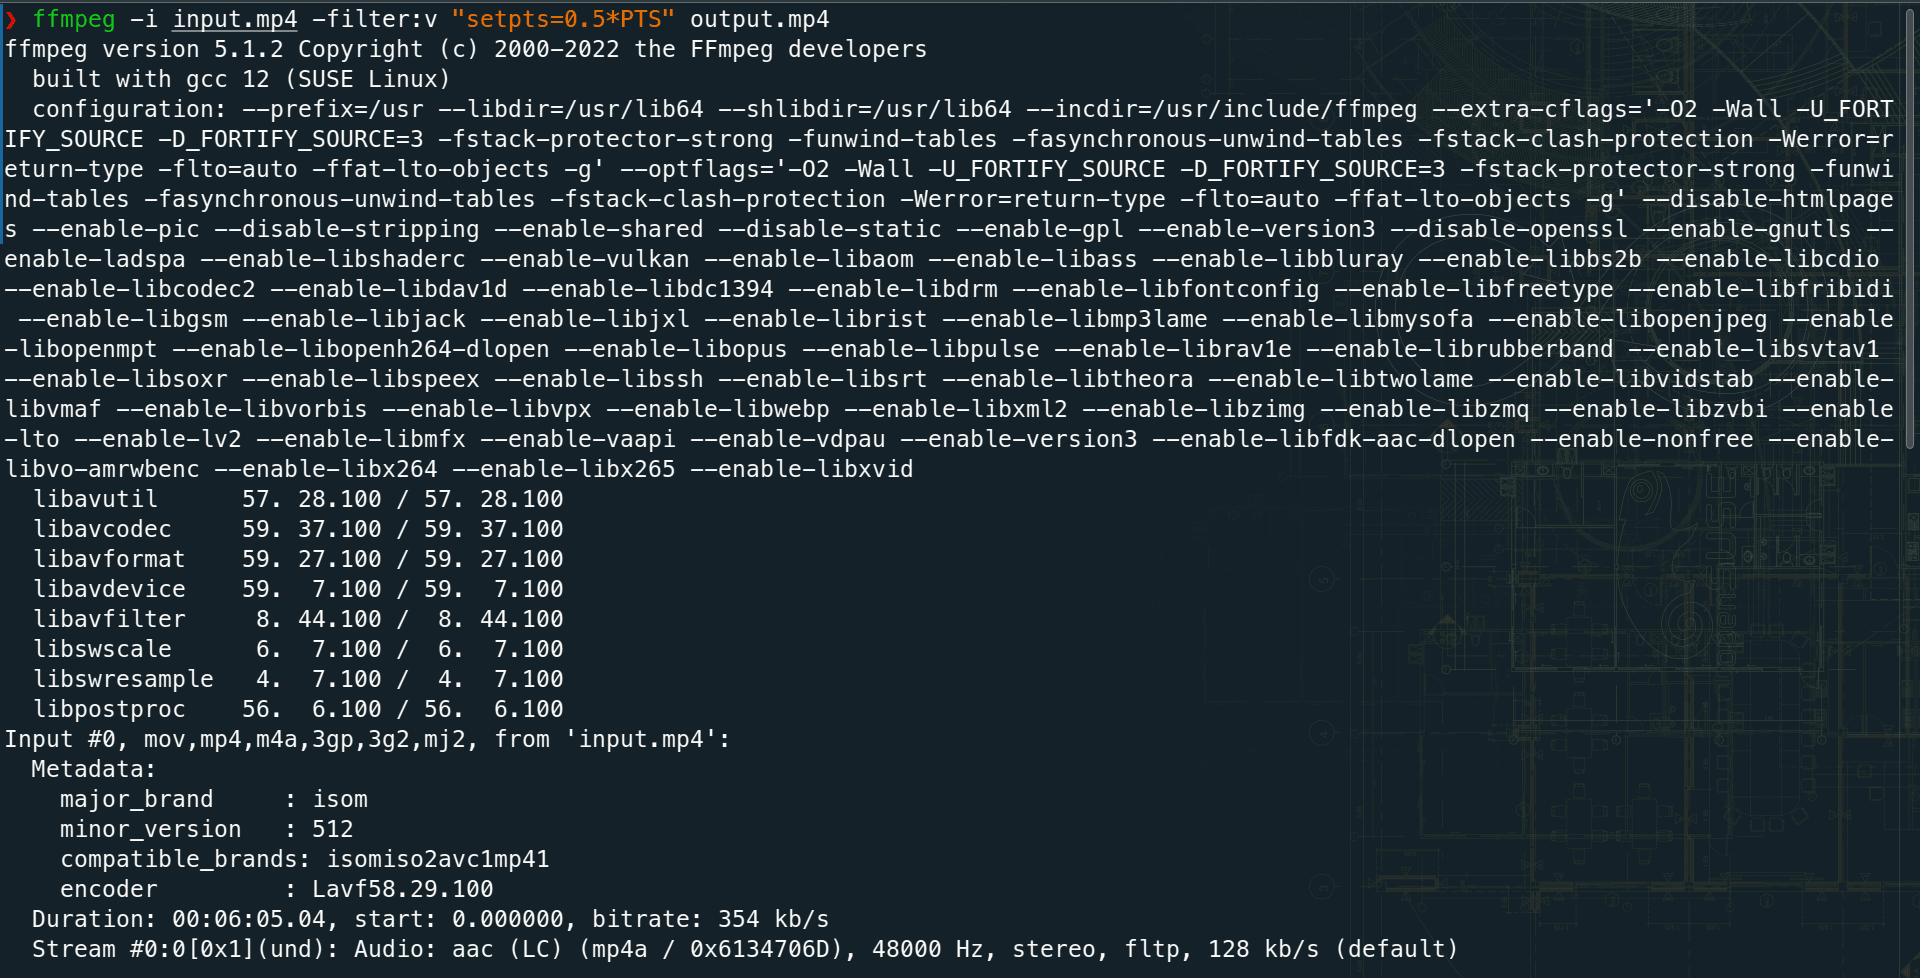
I find this useful in situations where I record a screen capture (no audio) while doing a demo, and I end up with, say, a 5-minute video that has several periods of no activity (e.g. waiting for a process to complete). I could speed up the video and hence reduce its overall time to, say 2.5 minutes:
# the 0.5 here means we're reducing the video to half the original time.
# adjust this to suit your preference. If the value is above 1.0, then you're making your video slower
ffmpeg -i input.mp4 -filter:v "setpts=0.5*PTS" output.mp4
If you wanna speed up video and audio at the same time:
# note here that the audio tempo is the inverse of the factor modifying frame timestamps. In English,
# if you're speeding up the video 2x, divide 1 by 2 to get 0.5 for the video, then
# use 2.0 as the factor for the audio tempo (this is 1 divided by video factor)
ffmpeg -i input.mp4 -filter_complex "[0:v]setpts=0.5*PTS[v];[0:a]atempo=2.0[a]" -map "[v]" -map "[a]" output.mp4
For more info and technical details, see
How to speed up / slow down a video on the FFmpeg Bug Tracker and Wiki.
Speed up video x1.5 but keep all frames on superuser.com.
concatenate video / audio
The assumption here is that you want to concatenate files with the same codecs. If this isn't the case, see this page on the FFmpeg Bug Tracker and Wiki.
What you wanna do is create a text file with all the files (whose paths can be either relative or absolute) you want to have concatenated in the following form:
file '/path/to/file1.mp3'
file '/path/to/file2.mp3'
file '/path/to/file3.mp3'
It is possible to generate this file with a bash for loop, or using printf. Either of the following would generate a file containing every *.mp3 in the working directory:
# with a bash for loop
for f in *.mp3; do echo "file '$f'" >> text_file.txt; done

# or with printf
printf "file '%s'\n" *.mp3 > mylist.txt
Then, using FFmpeg:
# The -safe 0 is not required if the paths are relative
ffmpeg -f concat -safe 0 -i text_file.txt -c copy output.mp3
For more info and technical details, see
Concatenating media files on Stackoverflow
How to concatenate two MP4 files using FFmpeg? on the FFmpeg Bug Tracker and Wiki
extract audio from video
If we don't wanna re-encode, then we first have to run ffprobe on the video file to list available audio streams and their types:
❯ ffprobe video.mp4
ffprobe version 5.1.2 Copyright (c) 2007-2022 the FFmpeg developers
  built with gcc 12 (SUSE Linux)
  configuration: --prefix=/usr --libdir=/usr/lib64 --shlibdir=/usr/lib64 --incdir=/usr/include/ffmpeg --extra-cflags='-O2 -Wall -U_FORTIFY_SOURCE -D_FORTIFY_SOURCE=3 -fstack-protector-strong -funwind-tables -fasynchronous-unwind-tables -fstack-clash-protection -Werror=return-type -flto=auto -ffat-lto-objects -g' --optflags='-O2 -Wall -U_FORTIFY_SOURCE -D_FORTIFY_SOURCE=3 -fstack-protector-strong -funwind-tables -fasynchronous-unwind-tables -fstack-clash-protection -Werror=return-type -flto=auto -ffat-lto-objects -g' --disable-htmlpages --enable-pic --disable-stripping --enable-shared --disable-static --enable-gpl --enable-version3 --disable-openssl --enable-gnutls --enable-ladspa --enable-libshaderc --enable-vulkan --enable-libaom --enable-libass --enable-libbluray --enable-libbs2b --enable-libcdio --enable-libcodec2 --enable-libdav1d --enable-libdc1394 --enable-libdrm --enable-libfontconfig --enable-libfreetype --enable-libfribidi --enable-libgsm --enable-libjack --enable-libjxl --enable-librist --enable-libmp3lame --enable-libmysofa --enable-libopenjpeg --enable-libopenmpt --enable-libopenh264-dlopen --enable-libopus --enable-libpulse --enable-librav1e --enable-librubberband --enable-libsvtav1 --enable-libsoxr --enable-libspeex --enable-libssh --enable-libsrt --enable-libtheora --enable-libtwolame --enable-libvidstab --enable-libvmaf --enable-libvorbis --enable-libvpx --enable-libwebp --enable-libxml2 --enable-libzimg --enable-libzmq --enable-libzvbi --enable-lto --enable-lv2 --enable-libmfx --enable-vaapi --enable-vdpau --enable-version3 --enable-libfdk-aac-dlopen --enable-nonfree --enable-libvo-amrwbenc --enable-libx264 --enable-libx265 --enable-libxvid
  libavutil      57. 28.100 / 57. 28.100
  libavcodec     59. 37.100 / 59. 37.100
  libavformat    59. 27.100 / 59. 27.100
  libavdevice    59.  7.100 / 59.  7.100
  libavfilter     8. 44.100 /  8. 44.100
  libswscale      6.  7.100 /  6.  7.100
  libswresample   4.  7.100 /  4.  7.100
  libpostproc    56.  6.100 / 56.  6.100
Input #0, mov,mp4,m4a,3gp,3g2,mj2, from 'video.mp4':
  Metadata:
    major_brand     : isom
    minor_version   : 512
    compatible_brands: isomiso2avc1mp41
    encoder         : Lavf58.29.100
  Duration: 00:02:32.96, start: 0.000000, bitrate: 452 kb/s
  Stream #0:0[0x1](und): Audio: aac (LC) (mp4a / 0x6134706D), 48000 Hz, stereo, fltp, 126 kb/s (default)
    Metadata:
      handler_name    : SoundHandler
      vendor_id       : [0][0][0][0]
  Stream #0:1[0x2](und): Video: h264 (High) (avc1 / 0x31637661), yuv420p(progressive), 1280x720, 317 kb/s, 30 fps, 30 tbr, 15360 tbn (default)
    Metadata:
      handler_name    : VideoHandler
      vendor_id       : [0][0][0][0]
From above, we see that the audio stream format is aac. Then we can go ahead and
ffmpeg -i video.mp4 -map 0:a -acodec copy audio.aac
However, if we want to extract the audio in a specific format, say mp3, then we'll have to re-encode:
# here we're using libmp3lame <https://www.ffmpeg.org/ffmpeg-codecs.html#libmp3lame-1> for mp3 encoding
ffmpeg -i video.mp4 -map 0:a -acodec libmp3lame audio.mp3
compress audio
You have an hour-long 320kbps mp3 file weighing in at 144Mb. Let's say you want to reduce the target bitrate to 96kbps:
# -q:a 7 gives you an average bitrate of 100kbps
# for reference, see <https://trac.ffmpeg.org/wiki/Encode/MP3>
ffmpeg -i input.mp3 -codec:a libmp3lame -q:a 7 output.mp3
That should give you a resulting file ~45Mb! You'll have to play the file to determine if you are happy with the quality. Note that audio quality improves with increasing bitrate. Here's a quick guide (taken from wikipedia.org/wiki/Bit_rate#MP3):
32 kbps – generally acceptable only for speech
96kbps – generally used for speech or low-quality streaming
128 or 160 kbps – mid-range bitrate quality
192 kbps – medium-quality bitrate
256 kbps – a commonly used high-quality bitrate
320 kbps – highest level supported by the MP3 standard
Note(s)
For additional compression, you could mix down to mono (use 1 audio channel) and set the sample rate to 22050 Hz (which is half the standard 44.1kHz) by using
-ac 1for the former and-ar 22050for the latter.Refer to the FFmpeg MP3 Encoding Guide for more info and technical details
Also, check out Manipulating audio channels on the FFmpeg Bug Tracker and Wiki
extract part of a media file
Say you have a 45min audio file and you only need the part between 2min and 44min:
# time format is HH:MM:SS or HH:MM:SS.xx, where xx expresses decimal value for SS
# see <https://ffmpeg.org/ffmpeg-utils.html#Time-duration>
ffmpeg -i input.mp3 -ss 00:02:00 -to 00:44:00.00 [other options here] output.mp3
Gifsicle
compress a GIF file
gifsicle -O3 --colors 256 --lossy=30 -o output.gif input.gif
Reference: Optimize animated GIF size in command-line on superuser.com
Imagemagick
resize images
Using image width as a reference
# we want to resize the image, keeping the width at 1280px
convert -resize 1280x input.jpg output.jpg
Using image height as a reference
# we want to resize the image, keeping the height at 1280px
convert -resize x1280 input.jpg output.jpg
convert X to Y
Convert, say, a JPG file to PNG
convert image.png image.jpg
Convert PNG with transparency to JPG
# -flatten, by default, results in a white background
# see <http://www.imagemagick.org/script/command-line-options.php#flatten>
convert image.png -flatten image.jpg
Converting all pixels of a given color to transparent
# we want to make white transparent
convert image.jpg -fuzz 5% -transparent white image.png
Some References
[ImageMagick Snippets by Mohamed A. Hassan](https://gist.github.com/MohamedAlaa/d9b54cd856b3edce1510]
mozjpeg
compress JPEG images
Batch compress a bunch of JPG files in the current directory
for img in *.jpg; do mozjpeg -outfile /path/to/output/directory/$img $img; done
pngquant
compress PNG images
# this will compress image.png file and save it as a new file with name "image-fs8.png"
pngquant image.png

# change output filename suffix. This will result in a new file image.min.png
pngquant image.png --ext .min.png

# save converted files in different location, instead of current directory
pngquant image.png --output path/to/output/directory/image.png

# strip Image metadata
pngquant --strip image.png

# skip saving files if the size of compressed files are larger than original files
pngquant --skip-if-larger image.png

# specify min/max quality
# set image quality in range 0 (worst) to 100 (perfect)
# here we set the minimum image quality as 60 and maximum quality as 80
pngquant --quality=60-80 image.png
PDFtk
concatenate various PDF files
# this concatenates all pdf files in current directory, saving them as filename.pdf
pdftk *.pdf cat output filename.pdf

# concatenate specific PDF files
pdftk file1.pdf file2 cat output filename.pdf

# if you want to see what's happening,
# add the verbose option at the end of your command. This is true for any pdftk operation
pdftk *.pdf cat output filename.pdf verbose
rotate PDF
# rotate page 1 by 90 degrees clockwise
pdftk input.pdf cat 1east output output.pdf

# rotate page 1 by 90 degrees anti-clockwise
pdftk input.pdf cat 1west output output.pdf

# rotate page 1 by 180 degrees
pdftk input.pdf cat 1south output output.pdf

# rotate all pages 90 degrees clockwise
pdftk input.pdf cat 1-endeast output output.pdf

# rotate all pages 90 degrees anti-clockwise
pdftk input.pdf cat 1-endwest output output.pdf

# rotate all pages 180 degrees
pdftk input.pdf cat 1-endsouth output output.pdf
encrypt PDF
# No. 1: Encrypt a PDF using 128-bit strength (the default), withhold all permissions (the default)
pdftk file1.pdf output file1.128.pdf owner_pw your_password

# No. 2: Same as above, except printing is allowed
pdftk file1.pdf output file1.128.pdf owner_pw foo owner_pw your_password allow printing

No. 3: Same as No. 1, except password baz must also be used to open output PDF
pdftk file1.pdf output file1.128.pdf owner_pw foo user_pw baz
extract pages from PDF
# extract page 1, 4 and 5 from input.pdf, save them as one document, output.pdf
pdftk input.pdf cat 1 4 5 output output.pdf verbose

# same as above, but as separate files
for pages in {1,4,5};do pdftk input.pdf cat $pages output extracted-$pages.pdf verbose;done

# you can also extract a range, like page 3 to 15, or page 19 to the end of the document, or both:
pdftk input.pdf cat 3-15 output output.pdf verbose
pdftk input.pdf cat 19-end output output.pdf verbose
pdftk input.pdf cat 3-15 19-end output output.pdf verbose

# in one operation, you can extract pages from separate documents and combine them as one
# here, we have two files, file1.pdf and file2.pdf, and we're
# extracting pages 1-3 from file1.pdf, and extracting pages 4 to the end from file2.pdf
pdftk A=file1.pdf B=file2.pdf cat A1-3 B4-end output newfile.pdf verbose
"stamp" a PDF file with another PDF file
There are many practical use cases for this. For example, you want to add a watermark to a PDF, or you want to add a signature to a PDF.
# this usually works best if both files are of the same size
pdftk page_to_be_stamped.pdf stamp stamp.pdf output stamped.pdf

# same as above, but for a multi-page document
# see <https://www.pdflabs.com/docs/pdftk-man-page/#dest-op-multistamp>
pdftk document_to_be_stamped.pdf multistamp stamp.pdf output stamped.pdf
Ghostscript
compress pdf
Ghostscript is super powerful, and to be honest, the first time I encountered it I felt intimidated by the myriad of options available. Fortunately, Alfred Klomp has written an excellent wrapper around Ghostscript to reduce a PDF's file size. It comes as a BASH script called shrinkpdf, and has proved to be very handy for me over the years. I have even included it as part of my BASH setup script for Ubuntu servers
I normally add the script in a bin directory inside my $HOME directory, and ensure that
the script is executable (
chmod +x ~/bin/shrinkpdf)~/bin/is on my$PATH(export PATH="$PATH:$HOME/bin")
Then use it as follows:
shrinkpdf -o output.pdf input.pdf

# And an output resolution in DPI (default is 72 DPI) with the -r option
shrinkpdf -r 150 -o output.pdf input.pdf
OCRmyPDF
Add an OCR layer and convert to PDF/A
ocrmypdf input.pdf output.pdf
Add an OCR layer and output a standard PDF
ocrmypdf --output-type pdf input.pdf output.pdf
Correct page rotation
ocrmypdf --rotate-pages input.pdf output.pdf
Produce PDF and text file containing OCR text
ocrmypdf --sidecar output.txt input.pdf output.pdf
OCRmyPDF can also convert single images to PDFs on its own
# If the resolution (dots per inch, DPI) of an image is not set or is incorrect,
# it can be overridden with --image-dpi, e.g. --image-dpi 300
ocrmypdf image.png myfile.pdf
If you have multiple images, use img2pdf to convert the images to PDF. Here's an example, where you convert your images to PDFs, and then pipe the results to run ocrmypdf. The - tells OCRmyPDF to read standard input:
img2pdf my-images*.jpg | ocrmypdf - myfile.pdf
SVGO
Compress a single SVG file
# you can skip the optional -i argument
svgo -i input.svg -o output.svg
Compress multiple SVG files in a directory
svgo -f path/to/dir/with/svg/files -o path/to/dir/with/svg/output
It's worth mentioning that some of these commands are too verbose, and it's not easy to remember all the arguments and options for some of them. In such cases, I often find it useful to have BASH functions for some of these. For instance, I have one for encrypting PDFs:
# encrypt pdf, allow printing
encrypt_pdf() {
  encrypted_pdf="${1%.pdf}.128.pdf"
  pdftk "$1" output ${encrypted_pdf} owner_pw "$2" allow printing verbose

  # rename the files after encryption
  mv -v "$1" "${1%.pdf}_src.pdf"
  mv -v ${encrypted_pdf} "${encrypted_pdf%.128.pdf}.pdf"
}
I call it like this:
encrypt_pdf filename.pdf $(openssl rand -base64 12)
Hope you found this post useful! If you have any cool tricks and time-saving techniques, please share them in the comments!